Automated 6-Axis IMU Calibration Rig
Hardware & Automation
Case study for a dual-axis, counter-weighted tumbling rig engineered for pristine 6-point flight controller calibration, controlled wirelessly from an ESP32 access point.
Project Team

The Challenge
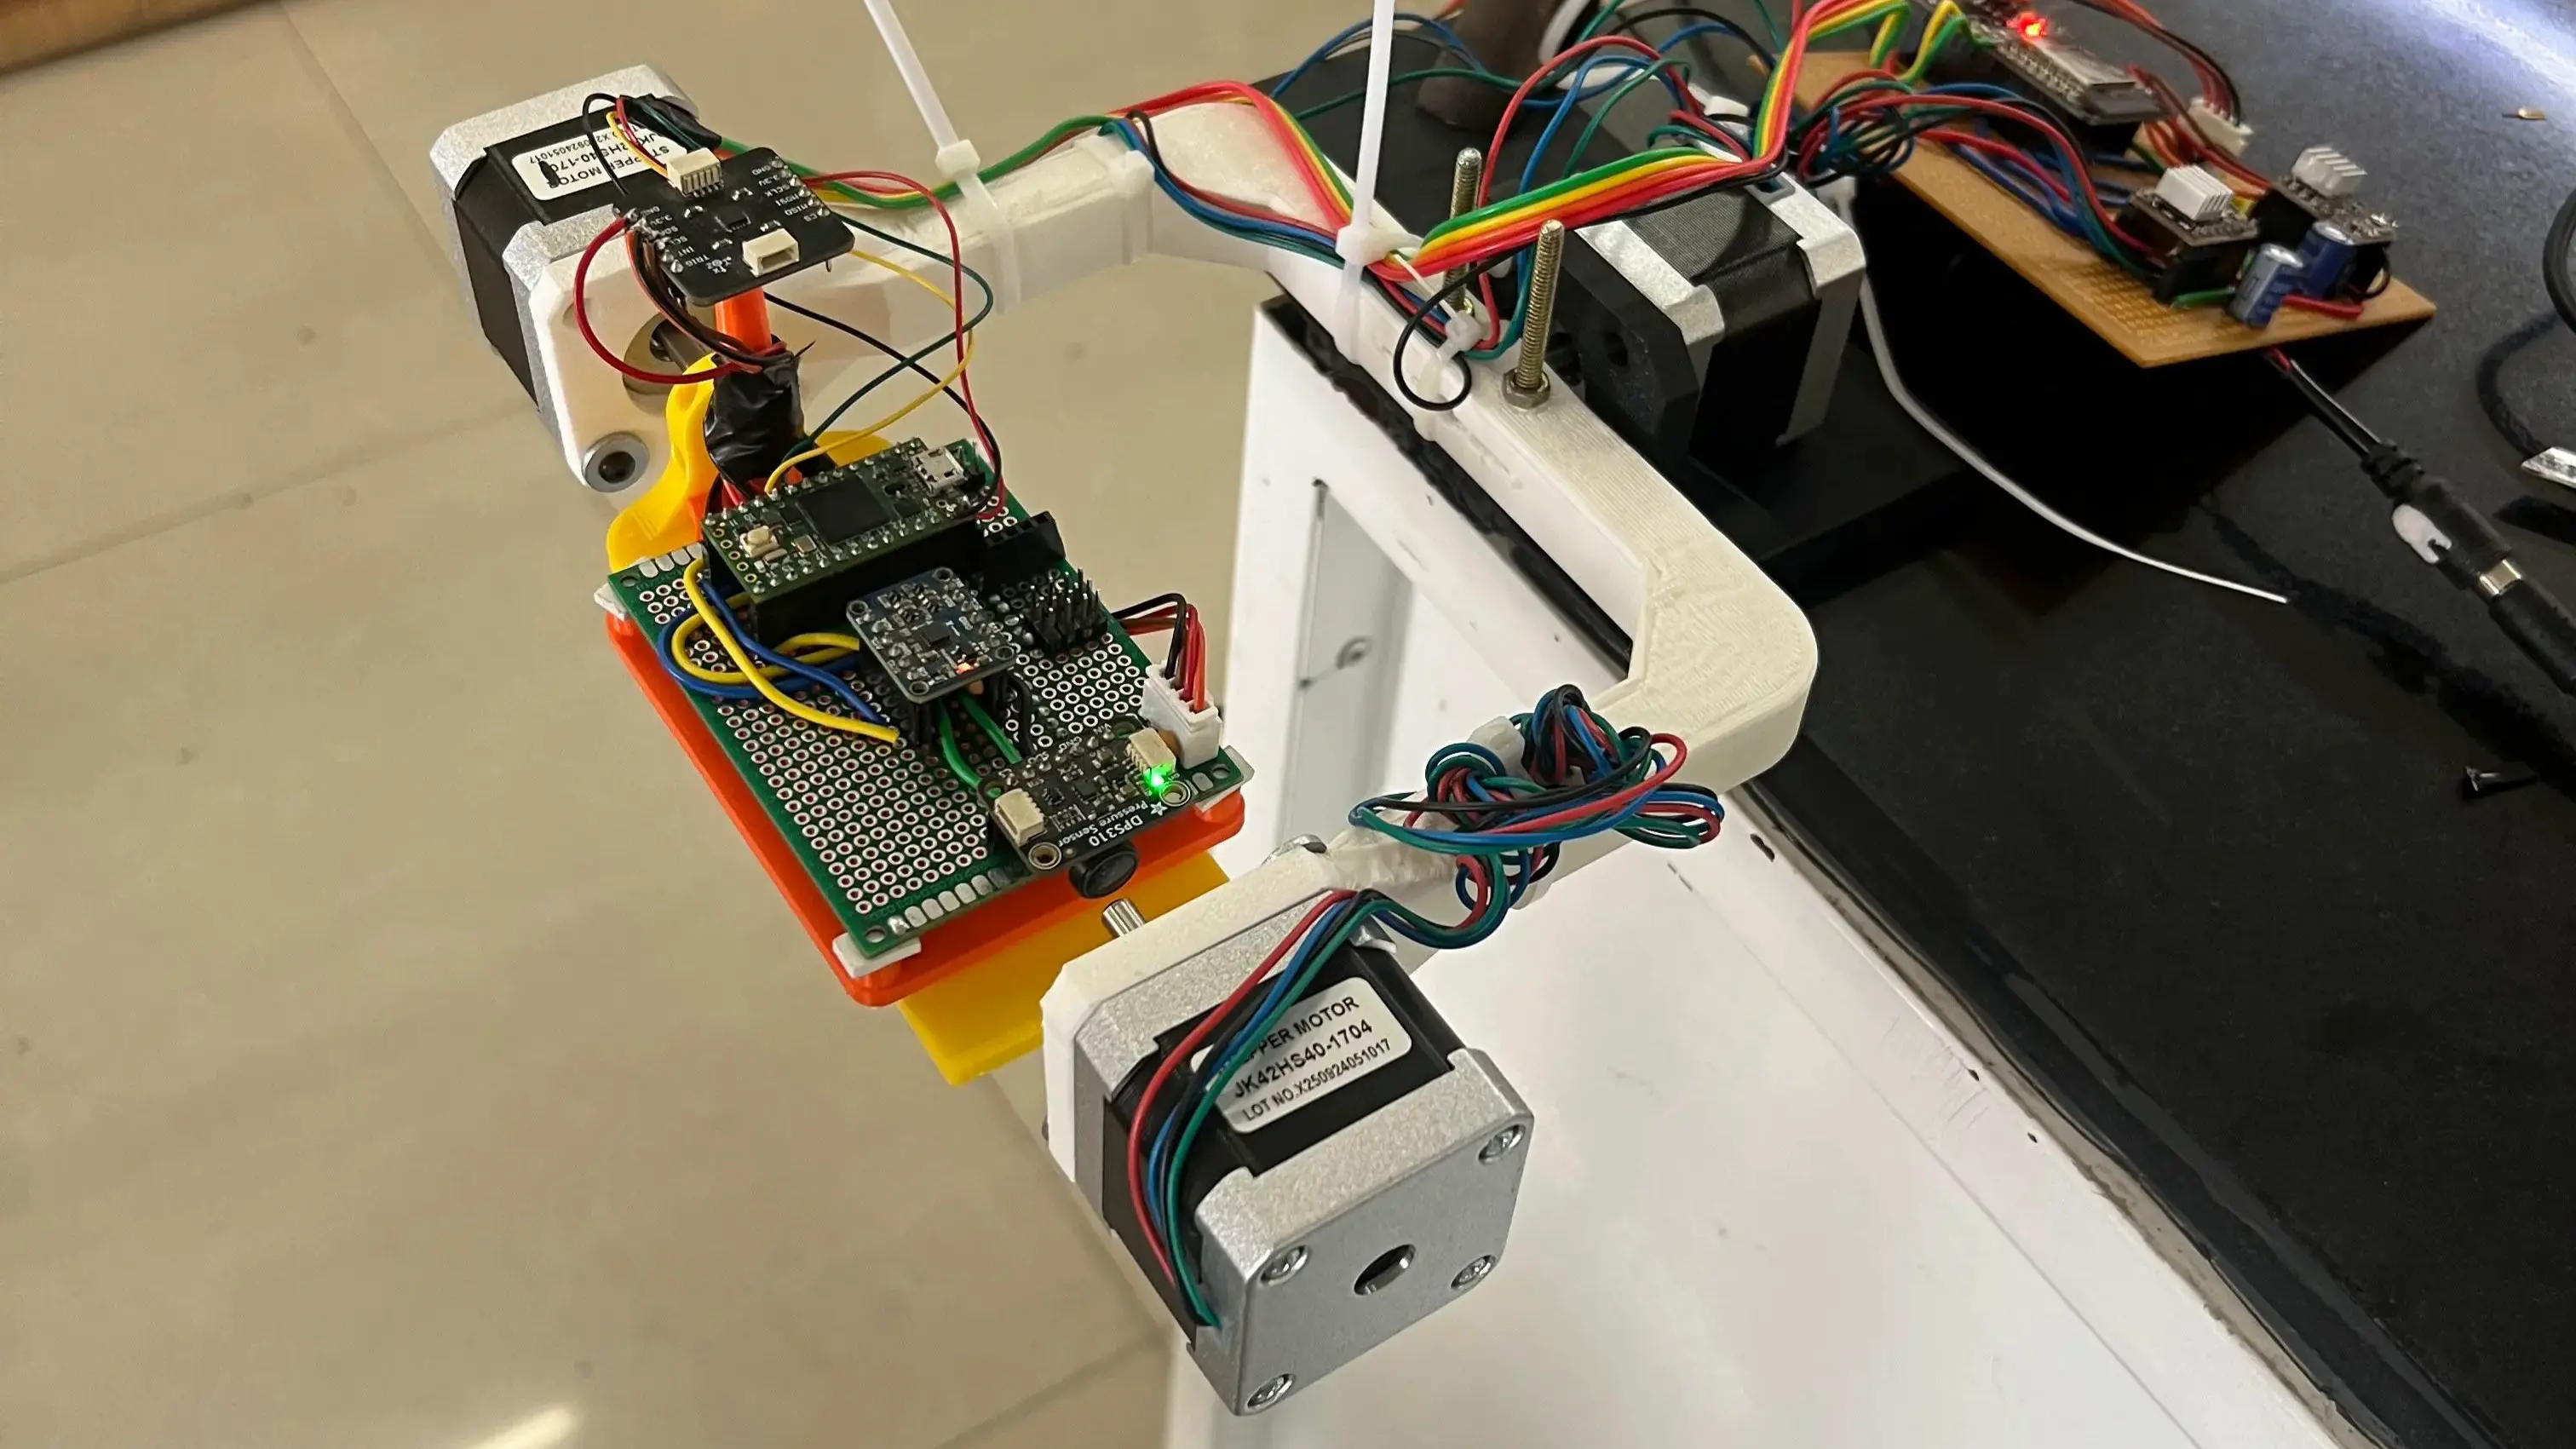
Flawless autonomous flight starts with pristine IMU calibration. Manually calibrating a flight controller by hand introduces micro-vibrations and inconsistent angles. I wanted to build a precision rig that could lock a board into all six standard calibration orientations (+Z, −Z, +X, −X, +Y, −Y) automatically and repeatably.
The main challenge was mechanical: suspending a motorized U-beam and a flight-controller sled in mid-air on a single shaft creates a massive cantilevered load. As a mechanical engineer, I wanted to solve this entirely through clever CAD design and optimized 3D printing techniques.
Technical Deep Dive
Mechanical Design & 3D Printing
Iterative Load Balancing: The first prototype made the cantilever problem immediately visible. The base NEMA 17 motor consumed over 65% of its holding torque just fighting gravity. To solve this, I designed a tuneable counter-weight system. By symmetrically mounting a second, unpowered NEMA 17 on the opposite arm, I shifted the center of mass perfectly onto the shaft axis. This made the assembly stable, symmetric, and highly repeatable.
Optimized 3D Printed Components:
- Print Orientation for Load Path: I printed the U-beam flat on its back using my A1 Mini. By aligning the continuous FDM perimeter walls with the primary bending moment instead of across the layer lines, I significantly increased the structural integrity of the arm, preventing it from flexing or snapping under load.
- Custom C-Clamp Hub: Standard PLA press-fits slipped under dynamic torque, and metal flanges weren’t locally available. I designed a custom hub in Fusion 360 with a stress-relief slit through the 5.2 mm bore and a perpendicular M3 pinch bolt, allowing the hub to clamp securely onto the shaft.
Hardware & Electronics Integration
While I focused on the mechanical structure, I integrated an ESP32 to act as a standalone wireless access point, hosting a dark-mode HTML dashboard. The stepper drivers (DRV8825) were hardwired to 1/32 microstepping and powered by an upgraded 12V 5A supply to maximize holding torque, keeping the sled dead-still during calibration.
Results
- Zero Dropped Steps: My counterweight design and custom 3D printed hubs eliminated all missed steps during the full 6-point calibration swing.
- Validated Accuracy: The rig’s mechanical repeatability and vibration-free settle time translated directly into a tighter sensor fusion solution for the flight controller.
- Production-Ready Assembly: The final build is highly robust, demonstrating how advanced 3D printing techniques can solve real-world structural engineering limitations.
Have a Similar Project?
Let's bring your idea to life with affordable 3D printing and expert drone services.